Showing posts with label fantasy. Show all posts

Saturday, August 23, 2014

Painting in 2014

http://teresayoung.artistwebsites.com/http://teresayoung.artistwebsites.com/http://teresayoung.artistwebsites.com/I've been trying new things this year, such as teaching a class on the basics of acrylic painting in February... For that, I had to figure out something everyone could relate to as a painting subject, and I settled on birds.  You can see on the left, it's in a style I thought I left behind years ago,  realism....


http://teresayoung.artistwebsites.com/http://teresayoung.artistwebsites.com/

http://teresayoung.artistwebsites.com/http://teresayoung.artistwebsites.com/http://teresayoung.artistwebsites.com/http://teresayoung.artistwebsites.com/
http://teresayoung.artistwebsites.com/
And following that, I started trying out other paintings in a more realistic fashion... I guess after you stay away from it for really long, it's all new again!
I figure, why limit myself?  I'm versatile, so I might as well move in any direction I please.
I'm posting here a cross section of where I've gone this year as a painter. As you can see, I'm not sticking to one area!


Monday, December 2, 2013

Friday, July 12, 2013

Peggy's Cove Festival of Arts opening night

Well last night at the opening was loads of fun!  We had six artists doing their art for people to watch (live!) and they called us 'Fresh Fish Artists'.... Which is pretty funny, because I found out when I was doing a bit of preparation practice that I cannot do a fish to save my life!  Hahahah! 

So I did the closest I could come, I painted a mermaid.  What?  She may be imaginary, but she is half fish!  LOL!

Here's the painting I worked on during the opening night. It's only about two thirds done, but people at the event got to see me paint this from the barest of underpaintings to the current state over the course of a few hours.

http://teresayoung.artistwebsites.com/

Monday, March 4, 2013

How to draw a face (Part 2)

This is a series of blog posts I'm starting to try to help others learn how to draw as I did.
http://teresayoung.artistwebsites.com/I used to do these techniques when I was initially learning portraiture from another artist that was trained in Germany. Of course, over time, I've stopped using the guidelines, as my muscle memory seemed to train in position and guaging the proportions by eye and hand. But this is a good way to learn, as it gives discipline and helps create a good result.
I started drawing faces as a very young child, but never caught a likeness until I was ten. After that, I was on fire! I drew constantly trying to get that almost mystical connection, the portrait that looked like whoever I was drawing...
I went to Stanley Park in Vancouver, British Columbia (Canada) constantly when I was thirteen and on vacation there one summer, learning from the portrait artists... They took pity on a young girl and let me sit and watch, and after awhile, they starting looking at what I was drawing and helping me! It was a wonderful two months...
Later on, I started selling portraits on my own (very cheaply!) to fund private art lessons to learn portraiture from a local artist where I lived, her husband was in the military, so she had originally trained with a classically educated portrait artist in Germany... She learned in the late fifties... I learned from her in the early seventies.

General sketching guidelines, explanations and tricks to train your hand and artistic eye to draw faces. This excludes shadowing, which I will go into later.

How to draw a face (Part 1)

How to draw a face (Part 2)

Now, let's take a look at how to draw the nose. The previous section was on drawing the overall guidelines and how to draw the eyes. See the previous post for this info.

Noses:  They come in all shapes and sizes and on top of that, they are constantly stretched and pulled out of their 'resting' state by the facial muscles, so you can get many different views of a specific nose even viewed face on. 
The larger the size of the nose, the more distinct the lines (and later on in this workshop, the shadowing) around it…

Generally, within the framework of the lines we have added to the egg shape, the nose fits centrally in the face.
The length of the bridge itself is approximately the length of the third eye we discussed earlier. Where you measure the bridge as it starts to slope outwards from right between the eyes and end it at the bulb of the nose itself.
The top of the bulb of the nose generally starts just below line e in the diagram above, which is the top of the bottom third of the middle section of the egg.
If you place the nose too far up, it looks unrealistic, but it’s a very common mistake when first learning to draw the face.

Tips:  The nostrils are always drawn darker; this gives the nose depth and makes it appear more 3D. I like to draw in a suggestion of the light shadow line on the bulb or nose tip as it gives it a more defined shape.

The parts of the nose are the bridge, nostrils, nasal septum, philtrum, and bulb (or protruding tip of the nose). See diagram to the left of a front view of the nose.


You can indicate the bridge of the nose by drawing a line on the darker side of it, in a line drawing this gives a feeling of depth. Shadowing can be used instead in a drawing using shading techniques. Which is a post for another day!

I draw a curved line to indicate the dip under the nose, properly called the philtrum.
The nose is generally two eye lengths in total from between the eyebrows to the tip. Although it can vary slightly, from the tip of the nose to the centre line of the lips is another eye length. The width of the nose is about one and half eye lengths.

http://teresayoung.artistwebsites.com/
To determine the eye length, I've included a modified diagram showing the invisible third eye covered in part one of this post series...

Note:  If you enlarge the eyes, make sure your measure of an eye length is based on the unenlarged size. Which shouldn`t really be an issue as the enlargement should be in the height of the eye, not in the length horizontally. The eyes I've illustrated above are almost comically large, you can see even though the distance between the eyes is correct (which is why if looks attractive!), the eyes are so big, they give the impression of a child's eyes (with makeup on, somewhat creepy!).

Below, I've illustrated examples of how the angle of the nose can affect how it appears, even from a front on viewpoint.
Note that you have a nice, clear view of the nostrils, and their shape is almost circular...

As the nose angle changes, foreshortening changes the size and shape of every part of the nose, including the nostrils.

Even when you can't see the nostrils, it's a good idea for composition's sake, to draw the line delineating the bottom edge of the nose darker, to give the drawing depth and make the nose appear to project.


Wednesday, February 27, 2013

How to draw a face (Part 1)

http://teresayoung.artistwebsites.com/This is a series of blogposts I'm starting to try to help others learn how to draw as I did.  I used to do these techniques when I was initially learning portraiture from another artist that was trained in Germany.  Of course, over time, I've stopped using the guidelines, as my muscle memory seemed to train in position and guaging the proportions by eye and hand. But this is a good way to learn, as it gives discipline and helps create a good result.
I started drawing faces as a very young child, but never caught a likeness until I was ten.
After that, I was on fire! I drew constantly trying to get that almost mystical connection, the portrait that looked like whoever I was drawing...
I went to Stanley Park in Vancouver, British Columbia (Canada) constantly when I was thirteen and on vacation there one summer, learning from the portrait artists... They took pity on a young girl and let me sit and watch, and after awhile, they starting looking at what I was drawing and helping me! It was a wonderful two months...
Later on, I started selling portraits on my own (very cheaply!) to fund private art lessons to learn portraiture from a local artist where I lived, her husband was in the military, so she had originally trained with a classically educated portrait artist in Germany... She learned in the late fifties... I learned from her in the early seventies.

General sketching guidelines, explanations and tricks to train your hand and artistic eye to draw faces.  This excludes shadowing, which I will go into later.
Fig 1 Start with an oval (or an egg shape if that’s easier to remember) and divide it into thirds. Split in half vertically as well.  (These 'guide' lines are useful in setting the proportions of the adult face.)
Split the centre portion of your three main horizontal sections into three sections as well.

Finally, divide the vertical halves of your oval into halves again. 
Note: This process of proportional guidelines is based on a system called 'the golden mean', which was developed in renaissance times by artists.

Generally, the top of the eyebrows will line up with your top main face line labeled A in the diagram above. I've thrown in the nose and mouth on the sketch just for vanity sake here, I will go over that later on, step by step as well...
The eyebrows are centred on the secondary vertical lines f and g.  The nose and lips are centred on the middle vertical line C.


Our eyebrows actually rest at the top of the eye sockets, so you can draw in circles to represent the underlying curvature and the eyes themselves will be situated within these circles.
For illustration purposes, I am going to draw in circles to represent the eyeballs, but it's totally unnecessary to do this as a regular practice, even while you are learning, just using the general guidelines to train your hand and eye to the correct proportions is best.
Also note, these imaginary eyeballs are lined up with the inner wall of the sockets, this is because of the great rule of thumb, we all have a 'third eye' between our eyes. If you look at ninety percent of people, and use your thumb as a measuring stick to judge, you will find that the width of the space between the eyes in full front view, edge of inner tear duct to inner duct, equals the width of the eye itself.

Kind of creepy looking, isn't it? Wow! But it won't stay like that, this is just for illustration purposes.
I've divided the eye socket circles again, with a line between the centre line d and the top A and labeled the line j.
Unless we are in a horror movie, we never see the full eyeball, since they are covered top and bottom with skin and muscles.

I designated the halfway points of the eyes for illustration purposes with lines labeled h and i.

So, I've sketched in very basic eyes here, so that you can see a few things:

First, the eyebrows always extend out past the eyes; they're never lined up with the outer edge of the eyes.

Second, as long as you observe the 'third eye' distance, the viewer is more comfortable with the appearance of the face in general. It just 'feels right'.
Start changing that inner proportion and your portrait will just look wrong, wonky, and out of whack. It actually makes one feel uncomfortable when you look at it. You can make your eyes proportionally larger or smaller, just the spacing in between seems to be the most sensitive point. Most portrait artists will unconsciously slightly enlarge a person's eyes when they draw them, to make a more attractive portrait. Probably because we are all hard-wired to find children attractive, making the eyes slightly larger appeals more strongly. Children actually have larger eyes than they do once they reach their full growth. Since we're born with our final eye size and our faces grow around it as we age.
Don't go too far on enlarging the eyes to enhance the portrait, or you can end up with a cartoonish look. Too far would actually be the point where the outer edge of the eye lines up with the eyebrow end above.
Third, this is proportionality for an adult face, so our eyes are usually small compared with the size of our faces. The larger you make the eyes; the harder it is to maintain realistic proportions...
Since we aren't always shocked or surprised, the eyelid usually covers part of the iris and pupil of the eye.  (Unless of course we are looking down and the bottom section of the eye is hidden by our lower lid.)
When viewing the eye (depending on the distance), we often see the width of the lower lid due to the way it sits on the eyeball.  I often draw in a small circle or dot to represent the tear ducts, and make the upper eyelash line darker to represent the thickness and size of the lashes in comparison to the lower lashes.  I'll put in a few sparse lower lashes, but not too many or too dark, or once again, it starts looking cartoonish. A line is drawn above the upper eyelash line to represent where the upper eyelid ends. This can vary greatly, so there's no shortcut to figure out where it 'should' be.
Beneath the eye; dark shadows, bags and wrinkling will always follow the contour of how the eyeball sits in the eye socket.  This essentially mirrors the proportions of the eyelid above, so I think of it as a 'ghost lid’, I draw a partial line to identify where the edge of the curvature ends.
Since the eye surface itself is covered with fluid, it's glossy and reflects light. A good way to bring 'life' to a drawing of an eye is to leave one or two white dots on the pupil. I usually use one dot. Leave that white dot out, and the eyes usually look wrong or lifeless.
Pupil size can vary greatly due to lighting conditions, in bright light, the pupil can be quite small, in low light conditions, and it can be quite large. I generally like to go for the midrange; it gives a more attractive and realistic result.
(If you are drawing from a photograph as a reference and a flash was used, the pupils will be smaller than normal.
To make your drawing more realistic, I'd recommend drawing the pupils larger to give a pleasing result.)  
As the eye gazes in different directions, it moves partially out of sight under the upper eyelid and the rest of the face. 

This means we rarely ever view the whole circle of the eye (where the eye in this case refers to iris and pupil), so we are always drawing partially to represent this. 

When drawing the face, keep in mind the viewing distance you are working with in your image.
If you are close, you'll see a suggestion of lower lashes, width of lower lid and tear duct on the inner corner.

The further away, the more indistinct the details become. Drawing in eyelashes on a distance drawing of the face, appears very cartoonish and unrealistic.

Friday, October 12, 2012

Recent Art Awards and Exhibitions Last Quarter 2012

About Recent Artwork:
http://teresayoung.artistwebsites.com/
A Dream of Sentient Paisley
A work in progress by
Teresa Young.
http://teresayoung.artistwebsites.com/Well it's been an interesting year, but I certainly didn't get as much painting done as I would have liked! 
I've been experimenting with new techniques lately just to keep the creativity going, so I just finished a couple of paintings in the last week that were acrylic, but used acrylic gold paint for highlighting. It's very glittery and shiny! I like it! Unfortunately, the paintings are so new, I haven't managed to get good photos of them yet. I'll have to include them in a future post.

The Omnia Scroll Worldwide Tour:
Coming up on November 14th to December 12th, 2012, I am one of thirteen artists exhibiting at the Brighton Jubilee Library, a gorgeous venue as the ceiling goes up and up, and there is a wall of windows extending two stories that borders on the street.
My good friend Penelope Oakley, a wonderful artist in the UK and I collaborated on a painting this year that will be a part of this exhibition. As well as the painting image I've embedded above, 'A Dream of Sentient Paisley'. The artworks in this exhibition will be the initial images added in high resolution printing onto a banner that will expand over time called the 'Omnia Scroll'. This is pretty exciting as this is going to be an ongoing projec that expands over time. Penny is in talks to curate further exhibitions in this project path in Italy and Mexico. I'm hoping she manages to get something going for Canada at some point because I'd love to see this come to my home country!
For more details, please go to www.PenelopeOakley.org.

Physical Exhibitions of my paintings:
As I post this, I have artwork in two physical exhibitions, one in Berlin, Germany and the other in a very nice local restaurant in Hubbards, Nova Scotia Canada.
The Berlin exhibition starts on October 18th and runs until the end of the month. The restaurant exhibition, which is at a local establishment called 'The Trellis', is a group exhibition which the local art association I belong to puts on annually in October. It's called 'Home Grown 2012 - A Visual Feast' and started on October 6th and will run until November 3rd. There are some beautiful paintings in there, over twenty artists submitted this year, and as the owner remarked during the hangings, the artwork just gets better every year! Trellis Show 2012


http://teresayoung.artistwebsites.com/
Something To Do With Creepy
Starying Eyes, Glass art by
Teresa Young.
Another local exhibition I have the honour of being included in is occurring starting October 20th and ending on November 3rd, 2012. The exhibition is the result of a local competition called 'Creature Feature', a Halloween show!

Online Exhibitions and Competitions:
 Other exhibitions include the '14th Annual Abstraction Juried Online International Art Exhibition' a group show that results from the Upstream People Gallery's competition that ran last month. I managed to place as one of the finalists in this competition (yay!), gaining special recognition for two of my pieces: 'Chaos Out of Confusion' and 'The Ripple Effect'.


http://teresayoung.artistwebsites.com/
Exhale by Teresa Young
Another competition I entered online and managed to win in a month or more ago was on a gallery site called the 'The Abstract Artist Gallery'. Pretty close to my heart, considering my art style!The competition was titled 'The 2012 International Abstract Art Contest' and contained three separate categories where you could win, as well as an overall winner designation. I was lucky enough to win the best in category award for 'Whispers and Other Worlds' with my fantasy abstract piece 'Exhale'.


http://teresayoung.artistwebsites.com/
Mother Earth is Hiding by Teresa Young
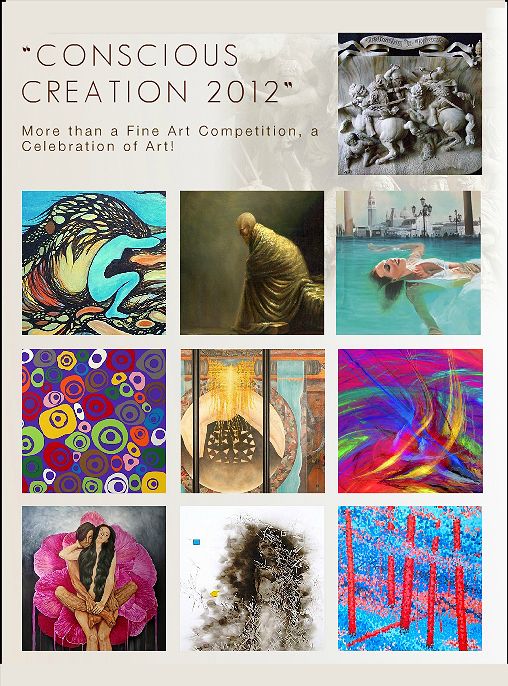
The arts network in Ferarra Italy that I'm a member of had a competition over the summer, and I was a finalist in it! The Vivid Arts Network Conscious Creation 2012 Fine Art Competition had a good response for entries, so I was quite honoured to win special recognition for my painting 'Mother Earth is Hiding'. The really nice thing about this award is that the artwork was included in an article in the Art Tour Magazine October 2012 issue, check out pages 24 and  31 on the preview link here.

Two other competitions that I was recently notified about:


http://teresayoung.artistwebsites.com/
Undersea Fantasy by Teresa Young
Shadows an online exhibition with the Linus Galleries website, based in southern California, US. The online link is in the process of being created, so I have no link to attach to this one. The painting that placed in that competition is Undersea Fantasy, which I created a nice statement for. It's pretty special to me as it was a product of my nostalgia for scuba diving in my youth!
Years ago, I was quite fond of scuba diving in the northern Pacific Ocean, exploring near the smaller islands around the Strait of Juan de Fuca. The undersea plant life in that cool water is quite different from the bright and colourful areas found in the far southern seas.
Since the ocean is so much colder, the colours are muted, and shadows predominate. The diver experiences a subtle, yet dangerous atmosphere, which makes for an enticing and mysterious experience. In this abstract acrylic artwork, a mass of dark patterns and colours dominate to capture that almost forgotten allure from my past aquatic adventures...


http://teresayoung.artistwebsites.com/
Synthetic Sunrise
by Teresa Young

 Open Art Exhibition – October 2012  Online Gallery Light Space & Time. I was lucky enough to receive a special recognition award for my acrylic painting, 'Synthetic Sunrise'.
I really liked doing this painting due to the sunset palette of colours I ended up creating there. It's quite powerful to work with the dark and moody colours to envision a future where our sunrises are something out of a dark fantasy.